4. メッセージ種別追加プログラム
IMBox ではメッセージ種別追加プログラムを実装することにより、次に挙げる例のような処理ができます。作成したメッセージ種別を IMBox に追加することで、タイムラインに投稿することができます。
4.1. サンプル実装
ここではサンプルとして、インフォメーションという新しいメッセージ種別を追加する実装方法について説明します。作成する資材は以下となります。
4.1.1. 設定ファイルの作成
メッセージ種別を追加するために、以下のファイルを設定してください。設定ファイル例src/main/conf/imbox-message-config/imbox-message-config_information.xml
属性 内容 display_flag メッセージ種別セレクトボックス表示フラグ enabled_flag 使用可否フラグ message_type_cd メッセージ種別識別CD message_type_name メッセージ種別名称のプロパティID post_type_path 投稿欄表示用ファイルパス display_path タイムライン表示用ファイルパス iconPath アプリケーションの表示画像のパス sort_no メッセージ種別ソートナンバー コラム
- メッセージ種別セレクトボックス表示フラグ に true を設定した場合、 メッセージ種別のセレクトボックスに表示されるようになります。通知のみに使用する場合は false を設定してください。
- 使用可否フラグ を true にした場合、使用可能となります。 false を設定した場合は、使用不可となります。
- 投稿欄表示用ファイルパス は投稿欄の表示として使用したいjsspのパスを設定してください。メッセージ種別セレクトボックスを切り替えた際に、表示されます。
- 投稿欄表示用ファイルパス は メッセージ種別セレクトボックス表示フラグ が false の場合は必要ありません。
- タイムライン表示用ファイルパス はタイムラインに表示として使用したいjsspのパスを設定してください。
- メッセージ種別ソートナンバー は既存のメッセージ種別が 1 となっています。メッセージ種別情報返却の際は、このソートナンバーで返却される保障はありません。
4.1.2. メッセージ種別投稿欄の表示画面の作成
設定ファイルに追加したメッセージ種別の「投稿欄表示用ファイルパス」に指定した画面を作成します。実装例投稿欄表示用HTMLの作成src/main/jssp/src/app/message_type/type_information.html
4.1.3. 投稿処理の作成
メッセージ種別を独自に追加した場合、対応する投稿処理をCSJSにて実装する必要があります。投稿処理のCSJS実装例<script type="text/javascript"> (function($){ $('#information_send_button').click(function(){ var button = $(this); var attributes = { informationDate : $('#information-date').val(), informationPlace: $('#information-place').val(), informationDetail : $('#information-detail').val() }; var title = $('#information-title').val(); var messageTypeCd = $('.imbox-timeline-sendtype-list').children(':selected').val(); var boxCd = ($imbox.timeline.clientType === $imbox.constants.CLIENT_TYPE_LIST['COMPONENTS']) ? $imbox.timeline.boxCd: $('.imbox-timeline-grouptype-list').children(':selected').val(); var url = 'imbox/send/' + encodeURIComponent(boxCd); var attachFlag = '0'; var files = []; var tagNames = []; $('.imbox-timeline-send-tag-list-hidden').each(function(){ tagNames.push($(this).val()); }); if(tagNames.length){ attachFlag = '1'; } for(i = 0, length = $imbox.fileName.length; i < length; i++){ if($imbox.fileName[i].key === 'imbox_timeline_send_form'){ files.push($imbox.fileName[i].name); } } var data = { 'send_message': title, 'messageTypeCd': messageTypeCd, 'displayId': $imbox.timeline.displayId, 'timelineType': $imbox.timeline.timelineType, 'clientType': $imbox.timeline.clientType, 'attributes': ImJson.toJSONString(attributes, false), 'attachName[]': files, 'attachPath': $('#imbox_timeline_send_attach_file_name').data('store_to'), 'attachFlag': attachFlag, 'tag_name': tagNames }; if(!imuiValidate('#imbox_timeline_send_form', imboxTimelineSendRules, imboxTimelineSendMessage, '')){ return false; } var success = $imbox.ajax.send('POST', url, data, $imbox.timeline.sendCallback, button); if (success) { $('#information-date').val(''); $('#information-place').val(''); $('#information-detail').val(''); $('#information-title').val(''); imuiResetForm('#imbox_timeline_send_form'); } }); })(jQuery); </script>url パラメータは以下のようにエンコーディング処理を行う必要があります。url = 'imbox/send/' + encodeURIComponent(boxCd);$imbox.ajax.send メソッドを使用する際に渡すデータにおいて、以下のパラメータは必須となります。
パラメータ 内容 send_message 投稿内容(任意の文字列を入力する箇所で利用してください。) messageTypeCd メッセージ種別識別CD displayId 画面ID timelineType 投稿した画面のタイムライン種別(スレッド形式で表示している画面は「TIMELINE_TYPE_THREAD」の固定値、メッセージ形式で表示している画面は「TIMELINE_TYPE_MESSAGE」の固定値となります。) clientType 操作しているクライアントの種別(PC版IMBoxを利用している場合は「IMBOX」の固定値、スマートフォン版IMBoxを利用している場合は「MOBILE」の固定値、IMBox連携用画面を利用している場合は「IMBOX」の固定値となります。) コラム
- 拡張項目を使用する場合は attributes オブジェクトを作成し、作成したい情報を設定してください。
- SSJSの投稿処理を記述する必要はありません。
4.1.4. タイムライン表示画面
設定ファイルに追加したメッセージ種別の「タイムライン表示用ファイルパス」に指定した画面を作成します。拡張項目として記述した attributes オブジェクトを表示する場合は、対応する表示処理をSSJSにて実装する必要があります。実装例タイムライン表示用SSJSの作成src/main/jssp/src/app/message_type/information_timeline.js
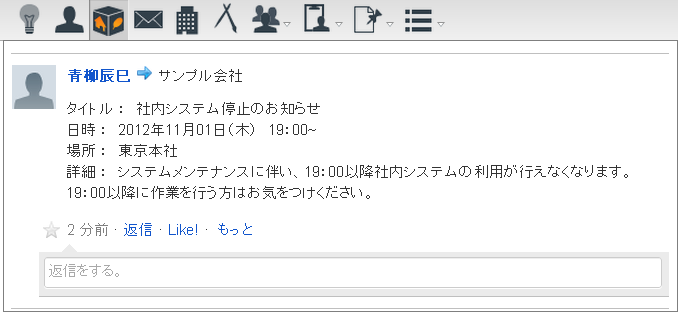
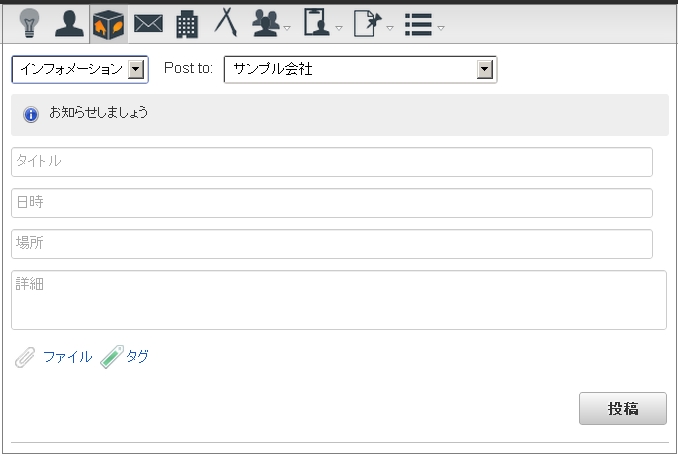
<div class="imbox-timeline-thread-post-right-body"> <p> <a href="imbox/usermessage/<imart type="string" value=$imbox.message.encodePostUserCd escapeXml="true" escapeJs="false" />" class="imbox-timeline-thread-post-user-name"> <imart type="string" value=$imbox.message.postUserName escapeXml="true" escapeJs="false" /> </a> <span class="imbox-timeline-thread-from-to-icon imbox-icon-common-16-arrow"></span> <imart type="string" value=$imbox.message.postTypeInfo.postToName escapeXml="true" escapeJs="false" /> </p> <div class="imbox-timeline-thread-post-right-body"> <div class="imbox-timeline-thread-message"> <div class="imbox-timeline-thread-message-area"> <div class="imbox-timeline-thread-message-text"> <div class="cf"> <div class="float-L mt-10"> タイトル : <imart type="string" value=$imbox.informationTitle /></span><br> 日時 : <imart type="string" value=$imbox.informationDate /></span><br> 場所 : <imart type="string" value=$imbox.informationPlace /></span><br> 詳細 : <imart type="string" value=$imbox.informationDetail /></span><br> </div> </div> </div> </div> </div> </div> </div>サンプルを実装すると以下のように利用することが出来ます。インフォメーション投稿時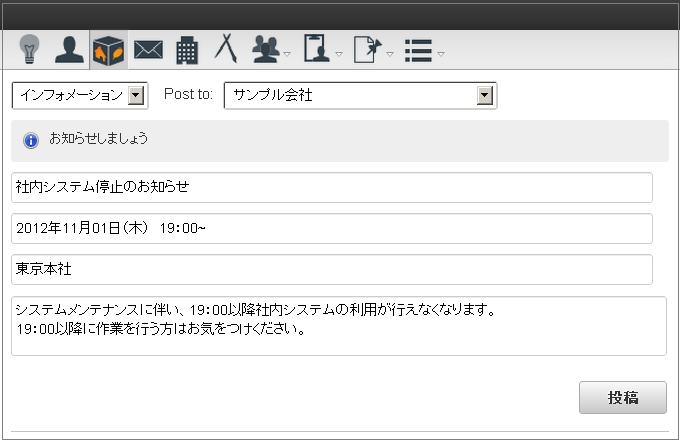 インフォメーションタイムライン表示時