6. intra-mart Accel Platform をセットアップする
intra-mart Accel Platform システム管理者 向けの作業です。
intra-mart Accel Platform のセットアップは 「 intra-mart Accel Platform セットアップガイド 」 を参照してください。
ここでは追加で必要な手順を説明します。
6.1. Web Application Server の設定
Web Application Server に WebSphere Application Server を利用する場合、 SharePoint Online を使用する際に以下のSSL証明書の認証問題が発生します。
- https://support.microsoft.com/en-us/help/2842146/you-experience-ssl-certificate-authentication-issues-when-you-use-shar (English)
- https://support.microsoft.com/ja-jp/help/2842146/you-experience-ssl-certificate-authentication-issues-when-you-use-shar (日本語)
- https://support.microsoft.com/zh-cn/help/2842146/you-experience-ssl-certificate-authentication-issues-when-you-use-shar (中文)
設定方法は「 WebSphere Application Server 利用時の追加設定 」を参照してください。
6.2. モジュールの選択
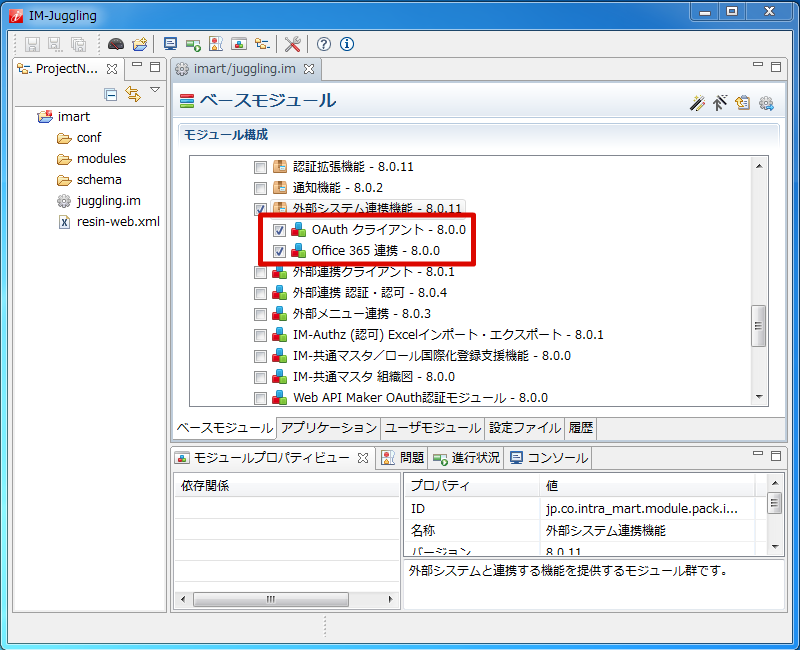
「 intra-mart Accel Platform セットアップガイド 」-「 プロジェクトの作成とモジュールの選択 」より、 Office 365 連携 , OAuth クライアント を選択します。
6.3. 設定ファイルの編集
Office 365 連携 を利用するための設定ファイルを編集します。
設定ファイルの詳細については、「設定ファイルリファレンス」-「 プロバイダ設定」 を参照してください。
 <?xml version="1.0" encoding="UTF-8"?> <oauth-provider-config xmlns="http://www.intra-mart.jp/system/oauth/client/config/oauth-provider-config" xmlns:xsi="http://www.w3.org/2001/XMLSchema-instance" xsi:schemaLocation="http://www.intra-mart.jp/system/oauth/client/config/oauth-provider-config ../schema/oauth-provider-config.xsd "> <oauth-providers> <oauth-provider id="Please_input_your_ID"> <provider-type>office365</provider-type> <name message-cd="CAP.Z.IWP.OFFICE365.FILESAPI.OAUTH.PROVIDER.NAME">Office 365 OneDrive API</name> <description message-cd="CAP.Z.IWP.OFFICE365.FILESAPI.OAUTH.PROVIDER.DESCRIPTION">It is allow the use of the Office 365 OneDrive API. It is possible to access a file on SharePoint online by using the Office 365 OneDrive API.</description> <icon-path>im_office365/images/office365_48.png</icon-path> <oauth-config> <authz-end-point>https://login.microsoftonline.com/common/oauth2/authorize</authz-end-point> <token-end-point>https://login.microsoftonline.com/common/oauth2/token</token-end-point> <client-id>[Please input your application's Client ID]</client-id> <client-secret>[Please input your application's Client Secret]</client-secret> </oauth-config> <extra-config> <parameter name="resource">https://[Please input your SharePoint's tenant ID].sharepoint.com</parameter> <parameter name="sharepoint.tenant">[Please input your SharePoint's tenant ID]</parameter> </extra-config> </oauth-provider> </oauth-providers> </oauth-provider-config>
6.3.1. プロバイダ設定
任意のプロバイダIDを指定してください。
<oauth-provider id="yourcompany.onmicrosoft.com">
   ・・・
</oauth-provider>
コラム
以下のように intra-mart Accel Platform の 対象のテナントIDを指定することも可能です。
テナントIDは半角スペースで区切って記載してください。
<oauth-provider id="yourcompany.onmicrosoft.com" target-tenant="default secondary">
   ・・・
</oauth-provider>
6.3.2. OAuth設定
client-id、client-secret には Microsoft Azure 管理者 が「 アプリケーションを設定する 」で取得したクライアントID、キーをそれぞれ指定してください。
<oauth-provider id="yourcompany.onmicrosoft.com">
   ・・・
   <oauth-config>
      <authz-end-point>https://login.microsoftonline.com/common/oauth2/authorize</authz-end-point>
      <token-end-point>https://login.microsoftonline.com/common/oauth2/token</token-end-point>
      <client-id>623d6fb4-8761-4cff-a763-bfbbc3c780f2</client-id>
      <client-secret>rGg/kuwrGwBHx/IUyKL5izxcp9NTlMQeXMtePicJox0=</client-secret>
      <scope></scope>
   </oauth-config>
   ・・・
</oauth-provider>
6.4. テナント環境セットアップ